
How to Blur Faces in a Photo (and Remove Location Data)
In the Effects tab, click Detect faces under Privacy (Safe Share), choose Blur or Pixelate, set the Strength and click Redact faces. Saved copies carry no EXIF or GPS data by default.
Requires Pluto Photos Pro (one-time $29, no subscription). The free download includes a 30-day trial of every Pro feature.
#1. Open the photo and the Effects tab
Open the photo you want to share. Scroll down the Effects tab to the Privacy: Safe Share section.
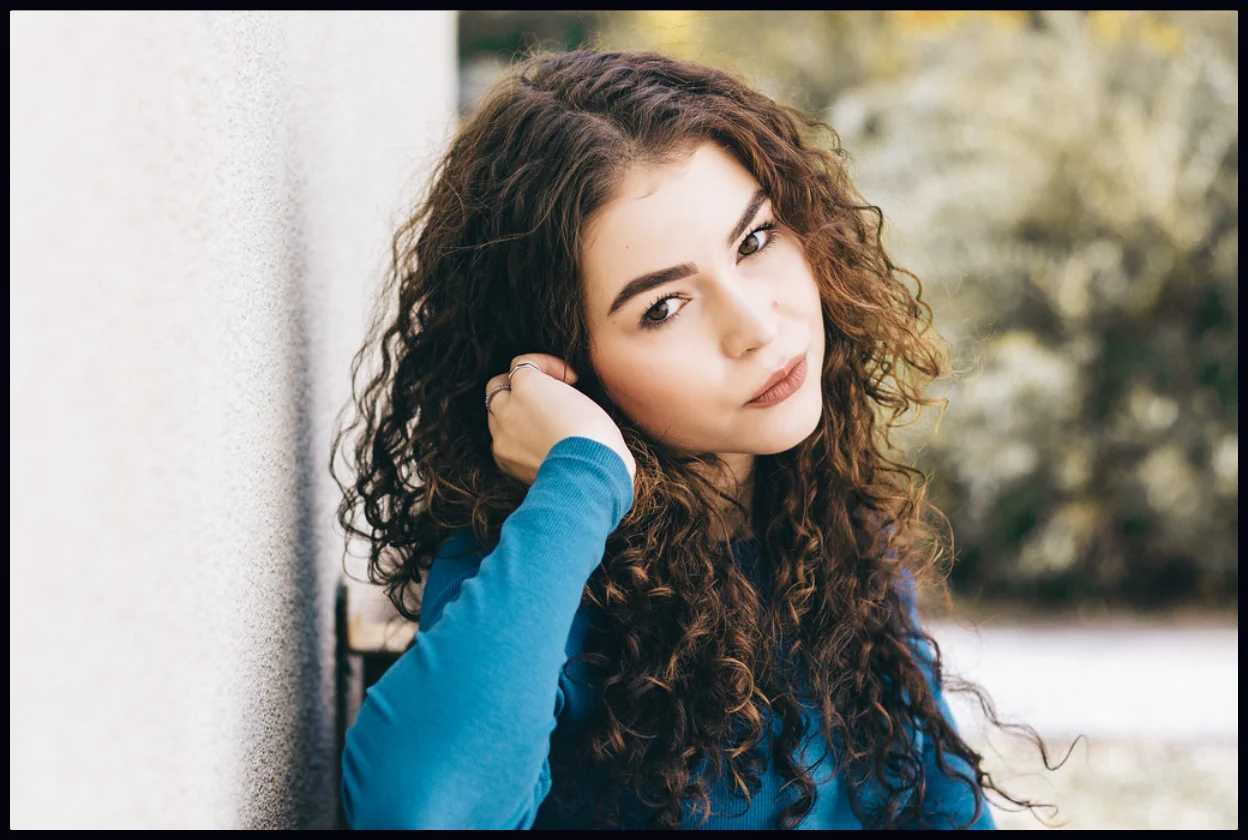
#2. Click Detect faces
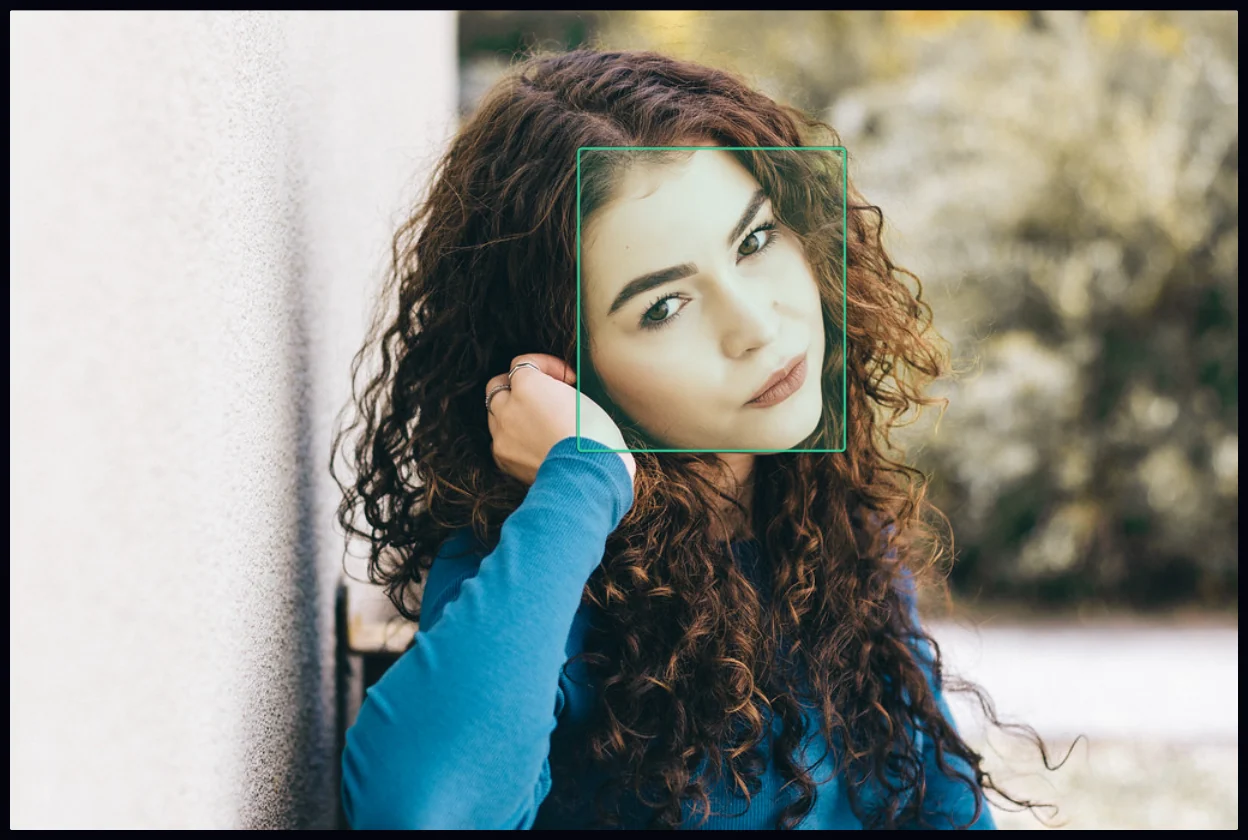
Click Detect faces. Every face found gets a box on the photo, and the panel says how many are selected, for example 1 / 1 faces selected. Click a box to include or exclude that face. A note in the panel confirms that detection runs 100% on this device and nothing is uploaded.
#3. Choose Blur or Pixelate and set the strength
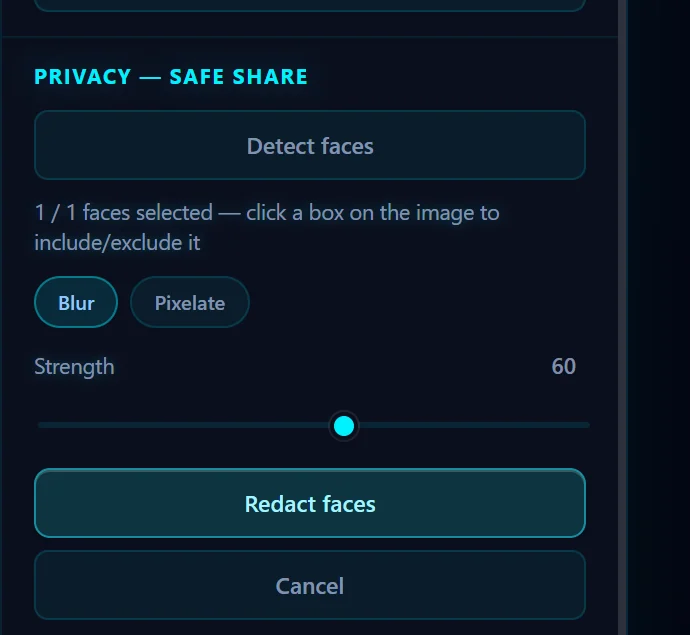
Pick Blur for a soft finish or Pixelate for a blocky one, and drag Strength until it looks right. The redaction covers the whole head, including hair and ears.
#4. Click Redact faces and save
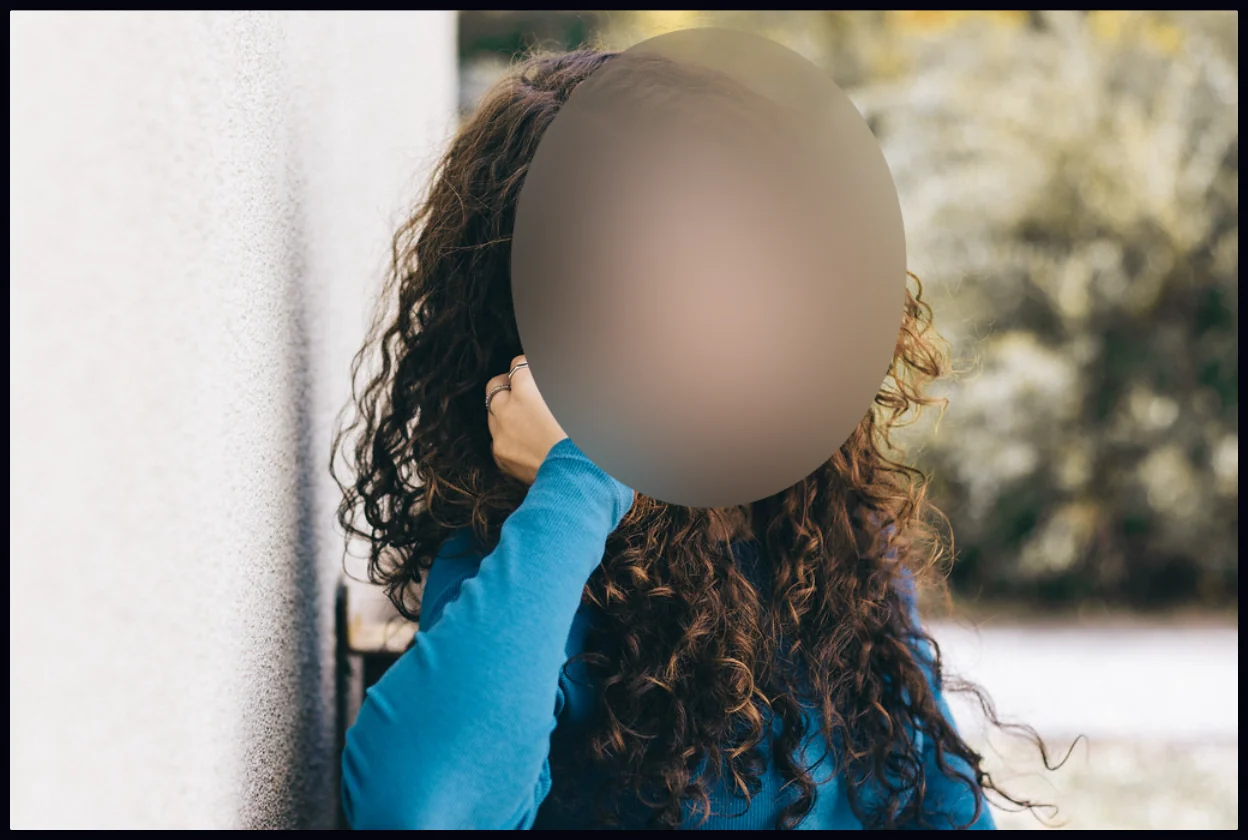
Click Redact faces. To undo, press Ctrl+Z. Then click Save as Copy. The saved file has no EXIF or GPS metadata unless you ticked Keep original metadata in the Export tab.
#Tips
- Check the result at full size. Detection can miss faces that are small, turned away or partly hidden. For those, use the Select tool and a blur or the Blur Brush.
- Pixelate is harder to reverse than a light blur, so use it when the photo needs to be properly anonymous.
- The video editor can blur faces too.
#Questions
- Does face blurring work offline?
- Yes. Face detection and the blur run on your computer, and nothing is uploaded.
- Does the saved photo still contain my location?
- No, not unless you tick Keep original metadata in the Export tab. By default a saved copy has no camera or GPS data.
- What if a face is missed?
- Use the Select tool to draw around it and apply a Gaussian Blur or Pixelate filter to the selection.
About the photo editor · Pricing · Download Pluto Photos · Contact support